Find my Assembly video for this project on my Youtube Channel here
On Thursday's at 8pm EST I roll out the inks, papers, stamps and dies and sit in the studio to prepare my weekly hour of sharing. A few weeks ago, I decided to get out some oldies but goodies which included the Gilding flakes and stencils.

The Apple A Day Die set has a very nice sized ornate frame die that creates a beautifully sized background for any smaller frame or shaped die to layer with.
The design paper is centered with a red card stock and an additional frame is cut in black to be placed just to the left off center. This process enables all of the contrasting colors to appear but also gives an elegant style to the project as well.
The focus image will be the embossed "THANKS" from the EZ Salutations stamp set centered onto the second largest frame in the Tiny Vine Die set after using a stencil and some Stazon inks on the white card stock.
After the focus point of the project is done, I cut two of the larger dies in the Tiny Vine Oval Die set once in red and once in black and again put the red centered behind the white oval then offset the black in the opposite direction than before. The project is now symmetrical in color and in style.
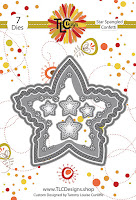
The final process in this project is to put a piece of double sided sheet onto some white card stock and die cut the Star Spangeled Confetti die. Once the die is cut, take off the protective cover revealing the adhesive. Time to get out your gilding flakes! I placed gold on one of these stars and some mixed flakes on the other star. Rub and burnish them into the adhesive and the star is placed between the two layers of contrasting frames. A bit of Autumn peaking out from the Thanks project and it is completed with a bit of ribbon on both layers!
I hope you enjoyed the project, wanna give it a try, feel free to check it all out on the You tube channel above and I hope you visit next Thursday!
Stay Crafty,


